Valheim beginners guide: Everything you need to know to get started in Valheim
Basic Mechanics
There are many mechanics you’ll be grappling with for your entire stay in Valheim.
Stamina
The most important stat to manage carefully, stamina determines many things and generally doesn’t recover too quickly, so wasting it is a big deal when you’re in combat or about to be. Take great care in ensuring you don’t get caught out with zero stamina by a pack of enemies.
Stamina is needed for: Running, Jumping, Swimming, Blocking, Attacking, Drawing and Holding an arrow, rolling, keeping a harpooned enemy tethered, and so on. Everything that isn’t walking or standing still. Swimming without stamina will cause you to take damage and can kill you.
Health
You start with a measly 25 HP, and this minimum will never increase. Health, without modifiers, will not recover much, if at all. Food will increase this notably and add to your regeneration significantly as well.
Food
Unlike many other survival games, food is not an absolute necessity to remain alive. It is, however, essential.
You can eat up to three different foods at a time, all with their stat changes and durations associated. These are easily visible via the food item’s tooltip. Ration your better foods and keep a good supply on you when you go out.
Combat
Combat is relatively simple in concept. There are attacks (LMB), alternate attacks (MMB), blocking (RMB), dodging (RMB + Space), and parrying (Timed Block).
Parrying is a powerful move but can be difficult on an enemy you’re still learning the moveset of. To do this, wait until the enemy has begun their attack swing (or similar) and block before it connects. When it does, if you timed it properly, you will be able to block more damage than you normally could, and the enemy will be staggered, open to critical hits. Parrying cannot be performed with a tower shield or similarly large shield without a parry modifier.
As of writing this, ranged attacks such as arrows or rocks can be parried, but this is assumed to be a bug of some nature. Purely elemental attacks or elemental effects cannot be blocked, but if it comes along with an initial hit of physical damage too, that can be blocked.
Using a bow is pretty straightforward, get the bow out, have arrows, draw until the circle is smallest, and shoot towards the enemy. You will need to compensate by aiming over the enemy most of the time, but it gets a bit weird when you aim straight up/down, so be sure to practice with the bow before trying to fight anything dangerous with it. You can move and jump while drawing/losing arrows, but if you run out of stamina, you’ll put the arrow away. You can cancel drawing/holding with the block key to avoid wasting an arrow.
Cooking
Related directly to food, early game cooking is simple. You set up a campfire, place a cooking station over it, and cook meats on it. Once they sizzle the first time, they are done cooking and should be taken off. If you forget it over the fire, it will burn.
Skill Levels
As you perform actions, such as running, jumping, swimming, woodcutting, and so on, you will gain skill experience in the related skill. Early on, this moves reasonably quickly but tapers off as your levels increase. Mousing over each skill in the tab menu will tell you what it does. The increases are not massive, and levels are less important than your gear, but they have a notable impact overall.
Death
You will certainly die, and the first time will probably be to a tree falling on your head. Upon death, a grave will be created that holds all of your items when you die. You will also lose a bit of skill experience, but so long as you don’t make a consistent habit of getting killed, it should have a relatively negligible impact on your skill growth overall.
To regain your items early on, just run over to your grave and interact with them. You will receive all your items so long as they do not encumber you. You will then receive the Corpse Run status, which significantly reduces stamina consumption and damage received for one minute.
Building
Building in and of itself is pretty straightforward. Place structures, enclose them, make sure it has a door so you can get in and out, but the mean monsters can’t. There is a stability system, which is easy to use in basic terms. With the hammer out, preferably on the repair option, so nothing obscures your vision, look at a piece of a structure. Going from Green to Red, green being very stable, and red being barely stable enough, the stability can be determined. Blue is special and means it is perfectly stable, meaning it is attached to the ground or similar.
Wood structures of all kinds suffer water damage, either from rain or being in direct contact with water otherwise (like the ocean). This will only reduce the structure’s health to ~50%, so it’s not the worst, but it would be bad if that’s what kept your house standing. A roof prevents all rain damage on the structures directly beneath it, and stone structures never suffer water damage for obvious reasons.
Stone structures lose stability faster, generally speaking, but when building with wood on top of them, regardless of the stone’s stability, the wood attached will be blue – perfectly stable, and you can build even further from there. This is very useful once you have a stone cutter and can place these.
Minimap
The minimap holds more information than you may initially realize. It will show you the map around you, obviously, and on the keyboard, the binds to zoom the minimap in and out are the “,” (comma) and. “(period) keys. The arrow on the minimap shows you the direction of the wind, which is important for sailing. The text in the top right informs you of the biome you are presently in.
Biomes
Biomes are general areas in the generation of the map. Being in or near a biome means you’re going to run into the monsters that inhabit it. In order of danger, the major biomes are Meadows, Black Forest, Swamp, Mountain, and Plains. If you are struggling a bit in one, don’t go to the next one.
There is also the generalized minor biome of the ocean once you go out to sea, which is generally as difficult as the Swamp to survive in, but it is possible earlier, depending on your luck.
Meadows
New Resources Available: Wood, Stone, Flint, Fine Wood*, Dandelions, Mushrooms, Deer Hide, Leather Scraps, Raw Meat, Feathers
Enemies: Greylings, Necks
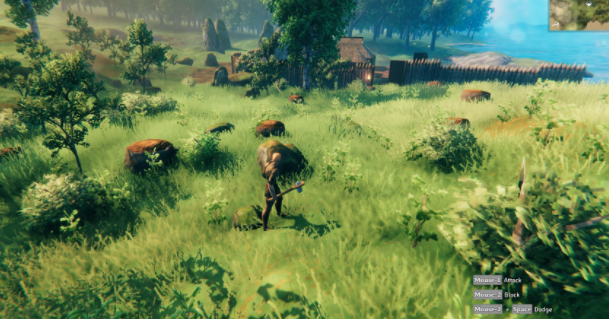
The Meadows is where your journey will begin and is likely where you’ll want to build a home and hearth. Until you have a bow and leather armor, it is recommended to stay here and not venture too far outside. Experiment with things, learn how to fight, run away, block, all that stuff. Experiment with building, and make sure you have a nice home with a bed and a decent amount of food stockpiled. At that point, take your bow and 200+ wood arrows, and fight the first boss. All this requires is going to the altar and sacrificing two deer trophies (not useful for much else up to this point anyway).
After beating the boss, you’ll have the materials to make your very first pickaxe. This will draw you to the Black Forest so you can make good use of it.
Black Forest
New Resources Available: Copper, Tin, Core Wood, Greydwarf Eyes, Surtling Cores, Troll Hide, Thistle.
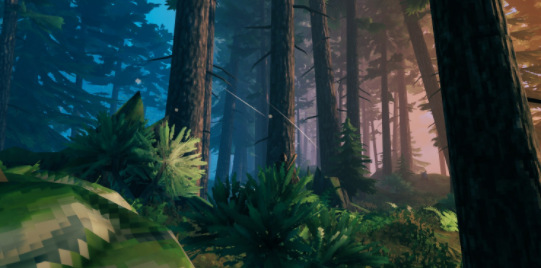
Enemies: Greydwarves, Trolls, Greydwarf Shamans, Greydwarf Brutes, Skeletons.
Once you have a pickaxe, you’re ready for the black forest. You’ll also want to get yourself a club and a shield for the dungeons you’ll need to go into, as the enemies there are weak to blunt damage, and dungeons are very cramped for using a bow. You’ll need surtling cores to smelt ore and make charcoal, and these are found in said dungeons. They are typically guarded by Skeletons, making them relatively easy to locate. The only other dungeon you may find is a Troll Cave, which is not recommended to go venturing into so early.
Surtlings themselves can be found in the Swamp, so if you can’t find surtling cores in the black forests near you but can find a swamp, this is an option but is not recommended.
Once you have a smelter and probably a kiln, you’ll be looking for Tin and Copper. Tin can be found on the shore of the black forest and has a distinct look compared to small rocks. Copper is similarly found where rocks would be, but instead, in the place of the huge stones you may have seen in the meadows. Both can be distinguished visually, but the easiest way to tell is simply by mousing over it and seeing if the name pops up.
Once you’ve exhausted all you feel like making with Tin, Copper, and Bronze and feel you’re ready, you can move on to the second boss. This one requires eight ancient seeds to summon and is similar to an Ent or what have you. Once again, lots of arrows, good food, do your best. You will receive a Swamp Key from defeating The Elder, as well as his trophy and another power.
Swamp
New Resources Available: Blood Bags, Ooze, Entrails, Ancient Bark, Iron.
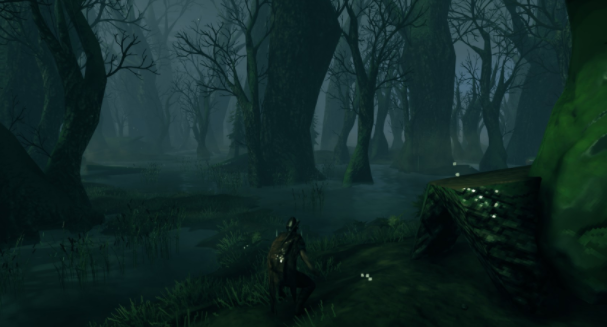
Enemies: Draugrs, Draugr Elites, Skeletons, Blobs, Oozes, Leeches, Surtlings.
Bringing some Poison Resistance Meads when you go to the swamp is recommended, but it is not necessary. Leeches, Blobs, and Oozers can inflict a poison effect, which, short of having rather high health, will typically end up killing you. But if you can avoid letting them hit you at all, you can’t die to it if you never get hit by it.
Making your way through a swamp, you may notice flame geysers. Surtlings gather around these, and killing them drops coal and surtling cores. If they go into the water, and they may do this accidentally sometimes, it will kill them or at least hurt them significantly. Fire damage is ineffective.
Otherwise, you will mainly be looking to bring along a bronze pickaxe and your swamp key. Look for slanted structures seemingly protruding from the ground, typically with two green torches at the front, guarded by Draugrs, Blobs, or an Oozer. Unlock the entrance with your swamp key, go in, and mine at the muddy scrap piles to find Scrap Iron. It can also be in the stone chests within. Smelt this to get Iron, and you’ll need quite a bit of it to get a full set going. Having a ship or cart nearby is recommended to avoid too much travel time, but be wary it doesn’t get destroyed while you’re mining.
Once you’ve had your fun in the swamps and are ready to move on, you’ll need eight withered bones, and you’ll have hopefully found the location of the boss. Go there prepared with a poison resistance mead, preferably at least two, and a blunt weapon and shield. Skeletons and slimes are weak to blunt, and he’s both. This boss is one of the easier ones to parry, and the poison resistance will handle his other attacks. Defeat him to obtain the Wishbone and his trophy.
Mountain
New Resources Available: Silver, Wolf Fang, Wolf Pelt, Freeze Gland, Obsidian.
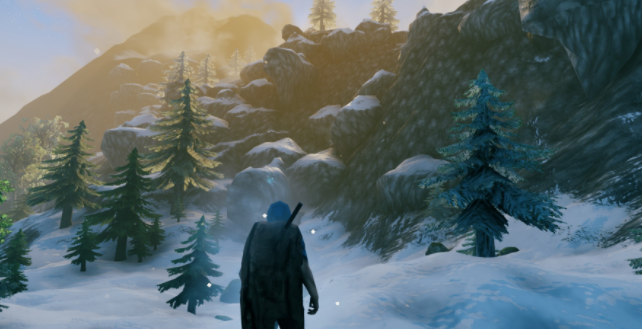
Enemies: Wolf, Fenring, Drake, Stone Golem.
Before venturing up onto the mountains, you’ll want to make a decent number of frost resistance meads. One batch (6) should do for a single person easily. You’ll want to go to a decently sized mountain with plenty of areas to explore. If you see drakes, you’re probably on a big enough mountain. You’ll also want to bring enough resources to toss down a small cabin with a bed, campfire, and boxes. A portal is recommended for ease of moving other resources and such.
Similar to all other metals, you’ll want a means to transport your silver back to base or do so on-site if you prefer. To find silver, you’ll need to equip the wishbone. You’ll know you’ve found a silver vein when it pulses green around you, and there is an audio cue as well. The closer you are, the faster it pulses. Once you think you’re about on top of it, dig down. It’s basically a metal detector. Avoid trapping yourself in as Drakes love to spit ice at you when you’re stuck in a hole you dug yourself into.
Follow the usual formula for getting better gear with Silver now, and take a gander at the interesting new options for weapons and armor. The wolf chest piece or cape is recommended first for its frost resistance, enabling you to generally not need the frost resistance meads, however, if you are wet upon entering the mountain biome, you will still freeze even with these equipped, but a mead will prevent this.
Plains
New Resources Available: Lox Pelt, Black Metal, Needle.
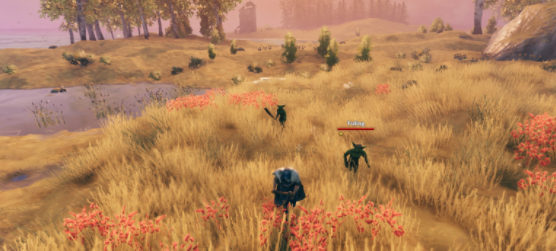
Enemies: Fuling, Lox, Deathsquito.
Deathsquitos are especially annoying if you don’t notice them for any reason, as they hit pretty hard and fast and are hard targets to hit when not coming in for an attack. It is best to kill Deathsquitos well before they notice you avoid having them dodge your arrows.
Sailing & The Ocean
Boats!
Sailing is an integral part of Valheim, as you would expect for a game centered on Norse Mythology. When you make your first boat (or raft if you like), you’ll notice it has its own UI and controls.
It works precisely how you’d expect in terms of steering with driving logic (hold right = go right, instead of inverse for actual rudders).
You have three options for forward and one for the back. Tapping forward once gives you paddling, twice is half-mast sail, three times is full mast. Backward is paddling only. The wind plays in heavily when using your sail. The direction of the wind is important, and the more “behind” you the wind is (shown on the indicator on the left), the more power you’ll get forward. When the wind is in “front” of you, in the darkened area of the circle, you’re in a dead zone and will not gain speed from your sail if you need to go in that direction, paddle.
The Ships: The raft specifically sucks, and rightly so. It’s pretty cheap and disposable, but without wind, it moves at a snail’s pace. The Karve moves pretty decently and is definitely better than walking if it’s not much different in terms of distance, even if you have to paddle a decent amount. It also comes with four storage slots. The Longship is, as it implies, long and the fastest as well. It comes with quite a few storage slots and is great.
The Ocean
Generally speaking, you’ll be ready to really make use of the seas around the time you’re ready, or nearly ready, to venture into the swamps. Going earlier is plausible, but I wouldn’t recommend it.
Not as terrifying as some games portray it, but ending up in the middle of the ocean without a boat is still a death sentence. But, hopefully, that won’t happen to you. Out on the high seas, you can find Sea Serpents as well as Krakens.
Sea Serpents are hostile creatures that will attack you and/or your ship. They are long fish-like creatures that move quickly and typically spawn during the night in stormy conditions. They drop useful meat for food, and, if you can harpoon and drag them to shore, so they don’t sink, scales which can make a very good shield if you get it early enough.
Krakens are inversely passive creatures, which do not attack. They are extremely large and can be spotted quite easily once found. They look at first like an island but bob with the waves and have strange growths on them called Abyssal Barnacles. They are 100% passive and will not mind the player unless they begin to mine the abyssal barnacles, which is the only resource you can gain from them. The barnacles drop Chitin, which is used to make the harpoon for dragging creatures (like the serpent) around, and a mighty backstab knife. However, after beginning to mine the barnacles, the Kraken will soon submerge itself into the depths, so be sure you’re not short on stamina or too far from your boat once it starts getting ready to go.

